Sunday, September 22, 2024

More Crochet Projects

For a long time, I was in the habit of cross-stitching while watching TV in the evenings as a way to wind down.  However, I don't enjoy finishing cross-stitch projects, so I just shove them in a drawer until I'm ready to add the straight stitching and turn them into a pillow or wall hanging.  That's why I haven't bothered to document each of those projects. However, since I learned crochet, I've been making much better progress toward the final products.  Here are some I've worked on in recent weeks.

This was my first scarf.  It is essentially just a bundle of chains -- a way to learn the most basic stitch.

I looked at a lot of beanie patterns and felt overwhelmed, so I did the simplest one.  I don't need another beanie but needed the practice.  I love this scarf.  I found an old skein of yarn in my collection that looked like it would make a nice scarf, and it did except I ran out of yarn.  I looked it up online to order more and discovered that it was from something like 2008 and is no longer made.  Fortunately, I found a second skein of the same yarn when I dug down to the bottom of my yarn pile.

My son and daughter-in-law sent me a skein of Red Heart Granny Squares yarn for Mother's Day and I got addicted using it to make granny squares, so I ordered a bunch more in different color schemes.

I made a wall hanging for my first project.

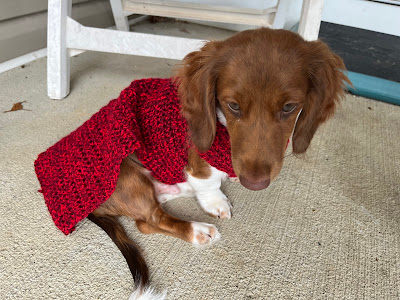
However, I ordered more of the same yarn, so I plan to finish this by making it into a blanket, and I will use the wall hanging space for a quilt... if I can ever finish it.  Right now is not the best time for me to be quilting because we have a young puppy who needs constant supervision, and quilting requires some concentration.  Crochet is a fairly mindless craft once the pattern becomes second nature.

Tuesday, July 2, 2024

First Crocheted Blanket


I've been learning crochet through books and videos, but I find that my aging brain can't hold onto too many steps for very long.  I decided to just practice two basic stitches over and over until they became habit.  However, I quickly bored of practicing without actually producing something, so I chose to make a lap blanket for the dogs and me to warm up with in the winter.  I started out with an old lavender skein from my stash, and I discovered that the yarn ran out quickly, leaving me with just a strip.  I couldn't find the exact same color of yarn anywhere, so I just picked up a dozen or so skeins of this multicolored purple, teal and white yarn at Hobby Lobby.  I decided to make the lavender strip a border, but then realized I needed a border on the opposite end too.  I ended up picking out a teal skein since a mismatched lavender would look like a mistake while an obvious conflict of colors would look intentional.  It really doesn't matter, because my dogs will shred the blanket in no time.  They already ripped holes in several of my quilts.  My Aussie pup's favorite thing to do is to untie and unravel rope toys with his teeth.  I'm hoping he won't discover any loose yarn on the blanket.  

The "lap" blanket ended up being more like a double-sized bed cover that doesn't hang down the sides.  It would probably fit a twin mattress just right.  It took a couple of months to complete, and my fingers have now experienced the joy of arthritis.  They are ready for a rest before the next crochet project, which will definitely be much smaller.  Something like a beanie, perhaps.

Saturday, November 21, 2020

Blue Willow Dinnerware Inspiration

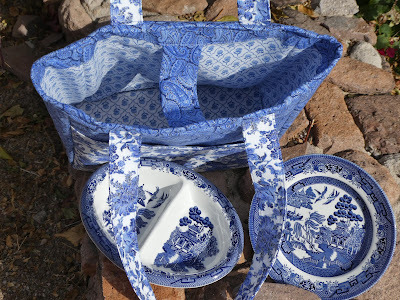
For years I have been collecting fabrics that look like the patterns you would find on fine china.  My goal was to make a wall hanging quilt with teacups, plates, bowls, and pitchers on it.  However, my attempts at piecing such objects failed, so when I made a tote for a friend who likes purplish blue, but not purple, I decided to use a couple of my fine china fabrics.  I love how it turned out.


Wednesday, September 23, 2020

Three Birds with One Stone

For my birthday this year, my husband surprised me with a new embroidery machine, which also doubles as a sewing machine.  He felt that my handbags needed a little embellishment.

It seems not so long ago, he also got me this Heavy Duty Singer sewing machine as a gift, because my old New Home machine was giving me fits.

About 12 years ago he bought me this long arm quilting machine to use with a quilting rack, as well.

I bought myself this serger simply because it was inexpensive and I wanted to make more professional looking hems.

All four of these machine, plus my old New Home are now sitting around the perimeter of my sewing room.  I figured I may as well set up three machines with different colored threads and sew three handbags simultaneously just to see if the process would go faster.  It did.  Now I officially have my own sweat shop.  But I'm the only employee.  And, yes, I do sweat a lot.

I revisited my colorful crazy dogs fabric with this first bag.  It probably looks familiar.  I made a tote out of that fabric previously, only this one has a different contrast fabric and a different design.


I hesitated to use one of my Bali fabrics on the interior, because they are so expensive and beautiful that they should be the featured fabrics.  But the colors matched so well with the crazy dog fabric.

These next two bags were my attempt at the American theme of baseball, hot dogs and apple pie, minus the hot dogs, unless you include the crazy dog fabric above.


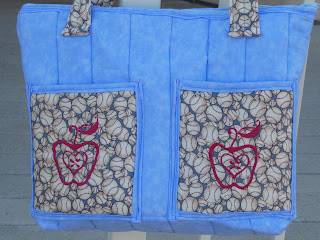
I embellished the baseball fabric with apple embroidery.  Unfortunately, the thread kept breaking, and I discovered that the embroidery machine doesn't have an easy way to pick up where it left off.  I had to hand embroider the gaps and didn't do a very good job.  I may have to sell this one for a discount.


The interior of the one above and the exterior of the one below sports an apple fabric.


The butterfly embroidery turned out really well.  The contrast is much better with white thread against the dark apple fabric than dark thread against the lighter, busier baseball fabric.  The machine had no problem using the white thread.  I suspect the red thread was a little rotten.  Thankfully, my husband bought me some fresh thread for my birthday too.


As usual, each bag had pockets galore on the inside.  I think I have enough handbags now to sell.

Monday, August 31, 2020

Yellow Daisies in the Sky Purse


One pocket on the front and two on the back.


Entire interior is lined with pockets.

This time I used a plastic needlepoint canvas to line the bottom.  It is much more flexible than cardboard, but the purse really doesn't need a bottom liner.  It's only purpose seems to be to cover up the bottom seam of the purse and provide an extra layer of protection.  I saw a lady in the supermarket this weekend who had a handmade quilted purse, and the corners of the bottom had holes in it and were frayed.  I could tell that she really loved that purse and wasn't willing to call it too worn to carry just yet.

Saturday, August 15, 2020

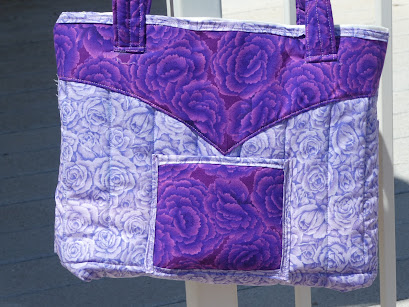
Purple Roses Purse

One pocket on the front...


Two pockets on the back...

Six pockets on the inside!


That's a record for me.  And they are different sizes.
There is a pocket specifically for a pen!
Do you know how often I dig through my purse for a pen?
Search no more.


I had trouble with my last purse of this design when sewing binding to the inside corners, so I opted not to use the binding on the inside this time.  I tried using my serger for that task, but there were too many layers for it to sew through, so I just did an overedge stitch on my sewing machine.  It's not pretty, but the seams will hold.  

I struggled making the darts on the bottom corners this time, so the bottom insert wouldn't fit.  I don't think the purse even needs that part.  This particular pattern instructs me to use plastic needlepoint canvas for the bottom shelf.  My other tote pattern instructs me to use cardboard.  I've learned that cardboard definitely does not work with this particular purse like it does with the totes.  So, if I get a nicely shaped bottom on any future purses of this model, I'll try the needlepoint canvas option.  Although, I'd much prefer to use that canvas for needlepoint projects instead of wrapping it in fabric and shoving it into the bottom of a purse to make it flat and sturdy.

The other big change I made this time around was to sandwich polyester batting in between the fabrics instead of fleece.  Fleece is more expensive, but easier to work with.  The polyester batting gives the purse more of a quilted look and feel.  However, I had to keep trimming the edges while using the polyester batting in order to get all the layers even enough to apply the binding, and that's why the bottom ended up being too narrow for a hard insert.

Wednesday, August 5, 2020

Green Leaves with a Plethora of Pockets

I bought a couple of different patterns from the one I'd been using to make my totes, in part because the tissue paper was poked to death by needles and getting fragile, and in part because I wanted to learn new ways of making bags.  This latest purse was made from the Simplicity 8310 pattern.

One pocket on the outside front.

Two pockets on the outside back.

Three pockets on the inside.

I reversed the fabrics for the inside and outside back pockets to  avoid overpowering the purse with green.

As usual, there were a few snags along the way.  I have trouble comprehending pattern directions, so I spend a lot of time reading and re-reading, staring at the diagrams, trying different things, and ripping out seams.  What works best for me is sleeping on it, because I usually wake up in the morning with a clear picture in my head on how I am supposed to assemble it.

For instance, the interior pockets were one long strip.  I noticed that the diagram suddenly showed the one long strip divided into three pockets, but nowhere were there instructions on sewing that pocket.  I thought it was an oversight, until I sewed the front pocket on, and realized that I had sewed right through to the interior strip, instantly dividing it into three pockets.  It's a genius way to save thread, avoid having to measure and draw chalk lines, and consolidate what would have been multiple steps into one.

Perhaps I had the biggest trouble with the bottom corners.  The instructions said to sew darts between the outside dots, and there were many ways to interpret that.  I kept folding and refolding the corners, yet nothing made sense until I slept on it.  This time I made notes along the way, so hopefully I won't make the same mistakes in the future.  The end result was all done correctly.  There was nothing that I did wrong that I couldn't undo.

There are a lot more fine details to this bag, such as the bias tape used to hide seams and allow for a decorative touch.

Thursday, July 16, 2020

Colorful Dogs and Bees Tote

Here is my latest...

The main fabric has all these crazy looking dogs on it, some with their paws in the air, others with their eyeballs popping out.  I used the green fabric for contrast because it had little bees flying around, which worked well with the dogs acting nuts.


Believe it or not, I forgot to include pockets on the inside again.  The pattern doesn't include pockets in the instructions and I forgot to make a cheat sheet, so this time I inked a reminder right into the instruction booklet.  The problem is that every time I sit down to sew, I get a gazillion phone calls or someone comes to the door and I get dragged off in some different direction.  Next thing I know, I'm racing to get the tote done before the next interruption.

Without fail, my dogs always start barking at something outside whenever I'm sewing.  I've learned that I can't ignore their barking, because they are usually barking at something legitimate, like a delivery or someone trespassing.  There are more illegal activities going on during this pandemic.  It's too bad people can't entertain themselves by taking up sewing rather than breaking the law.

I looked into getting a county business license so I can open an Etsy shop to sell these totes, but the website says I have to apply in person, an hour's drive away.  Who wants to do that during a pandemic?  I've had hospital helicopters racing past my house for the past two days.  I don't even want to risk going to the grocery store at the moment.

Monday, July 6, 2020

Speeding Up Production

I set up two sewing machines side by side with different colored threads so that I could piece together two totes simultaneously.  I was less likely to forget the instructions between totes that way.  There's always some step I forget, and then I have to either rip out all the seams and backtrack, or come up with a new way to piece the tote together with what I have to work with.

Speaking of ripping out seams, I also finally took the machines off a 2 stitch length and bumped them up to 3 to making seam ripping easier.  The longer stitches still hold together fine, but it's easier to get a seam ripper underneath the stitches if they are longer.

At first, I brought out my old New Home sewing machine and used it along with my new Singer Heavy Duty machine.  The Singer never causes me any problems, but the New Home drove me bananas.  I was experiencing everything from a fussy thread tension to broken needles to tangles of thread jamming the machine.  When it seemed I was never going to get out of that cycle, I set the New Home aside and pulled out my industrial Brother machine.  I normally reserve the Brother for using on a quilt rack, because it has an extra long arm, but I haven't set up my quilt rack in years.  Let me just say that the Brother machine was a breath of fresh air.  I can hear angels sing when I sew with it.  Problems solved.

This first tote I completed uses a glitter fabric with purples, teals, and greens that my daughter gave me for Mother's Day.  It's a really nice, thick, quality fabric.

I made taller pockets on the front to fit sunglasses and mobile phones.


So pretty.  I kept the purple theme on the inside, but totally forgot to make interior pockets like I had planned.  I think all the fussing around with that New Home machine tried my patience and I just wanted to get the job done.  In the future I'll tape notes to the wall in front of my work table to keep me on track.

Keeping the with dark color scheme, I used a black zipper.

This next bag used a purple and teal fabric I've had around for a while, and I've been salivating over using it to make a tote.  I struggled to find contrasting fabric in my stash.  It's difficult to see from a distance, but the green almost matches a small amount of green in the main fabric.

This bag has super tall pockets.  I think I'll tone it down in the future, because it almost completely covers the main fabric on the front.

However, you can see it it clearly on the back.

Black zipper.
Teal interior.