Showing posts with label needlepoint. Show all posts

Thursday, June 13, 2019

Sunflower Pillow

I completed a pillow made with Dimensions Dramatic Sunflower Needlepoint Kit, which contained presorted wool yarn, full color print on 12 mesh canvas, and instructions.  The design is by Lisa Audit and the finished canvas is 14x14 inches.

I enjoyed the needlepointing.  There were a couple of colors on the canvas that were difficult to tell apart, but the pattern is logical enough to figure it out. I chose this fabric for the backing because it mimicked the colors and shapes of the design on the front:

I had some difficulty re-shaping the canvas after I finished the needlepoint.  Because they recommend the continental stitch, the square canvas ended up more like a parallelogram.  I sprayed it with water and tried to stretch it back into a square on a bulletin board using pins, but after several attempts at that process without making much progress, I gave up.  I think in the future I will always do the basketweave stitch, even if the continental stitch is recommended.

Sewing it together was a fiasco, as always.  At first, everything was going suspiciously smoothly.  It was looking like I might get it done in one sitting and have time to do barn chores and make dinner.  Just when I began feeling elated over my good fortune, I turned the pillow over and saw that the backing fabric got bunched up and sewed down that way.  Out came the seam ripper.  I must have removed some pins prematurely.

Once I re-sewed the fabric down flat with the help of more pins, all I needed to do was double stitch another row around the perimeter of the pillow.  I could do that in one minute.  However, the thread broke.  Cut to re-threading the machine.  Then the needle broke.

I insisted upon being undaunted by all these challenges and worked as fast as I could to fix them.  I was determined to get that pillow done since I was so close.  However, the screw I needed to loosen to change the needle would not budge.  I had to locate some oil, oil it, and then hunt around in my husband's toolbox for some needle-nose pliers.  Once the needle was finally changed, I was on my way, whizzing along the border until the bobbin thread ran out.

Hands in air, I gave up.  I was running out of time to take care of my other responsibilities.  This morning, I put more thread on the bobbin and finished sewing the last row of stitches.  Then I turned it inside out and stuffed the pillow form inside.  Still a parallelogram.  Oh well.

I think the biggest insult in this entire project was when I suddenly remembered while sewing the last side of the pillow together that I forgot, once again, to include piping, lace or ruffles in the border.  This forgetfulness is getting to be a habit with me.  I think black lace would have looked nice, but there's no way I'm going to rip all those stitches out now.

Sunday, January 13, 2019

Two More Finished Needlepoint Pillows

I know what you're thinking:  How many pillows does one person need? 

Well, I don't need them, although they do come in handy propping up my laptop in my lap.  I just enjoy needlepoint.  It's a fairly mindless, easy craft one can do with her hands while focusing her attention elsewhere.  When I finish a canvas, I don't want to litter my walls with hangings, so I make pillows out of them and pile them in the corner of my craft room.  If I ever need to give someone a last minute gift, I can grab one, wrap it up really quick, and claim that I slaved over it for months just for that person. 

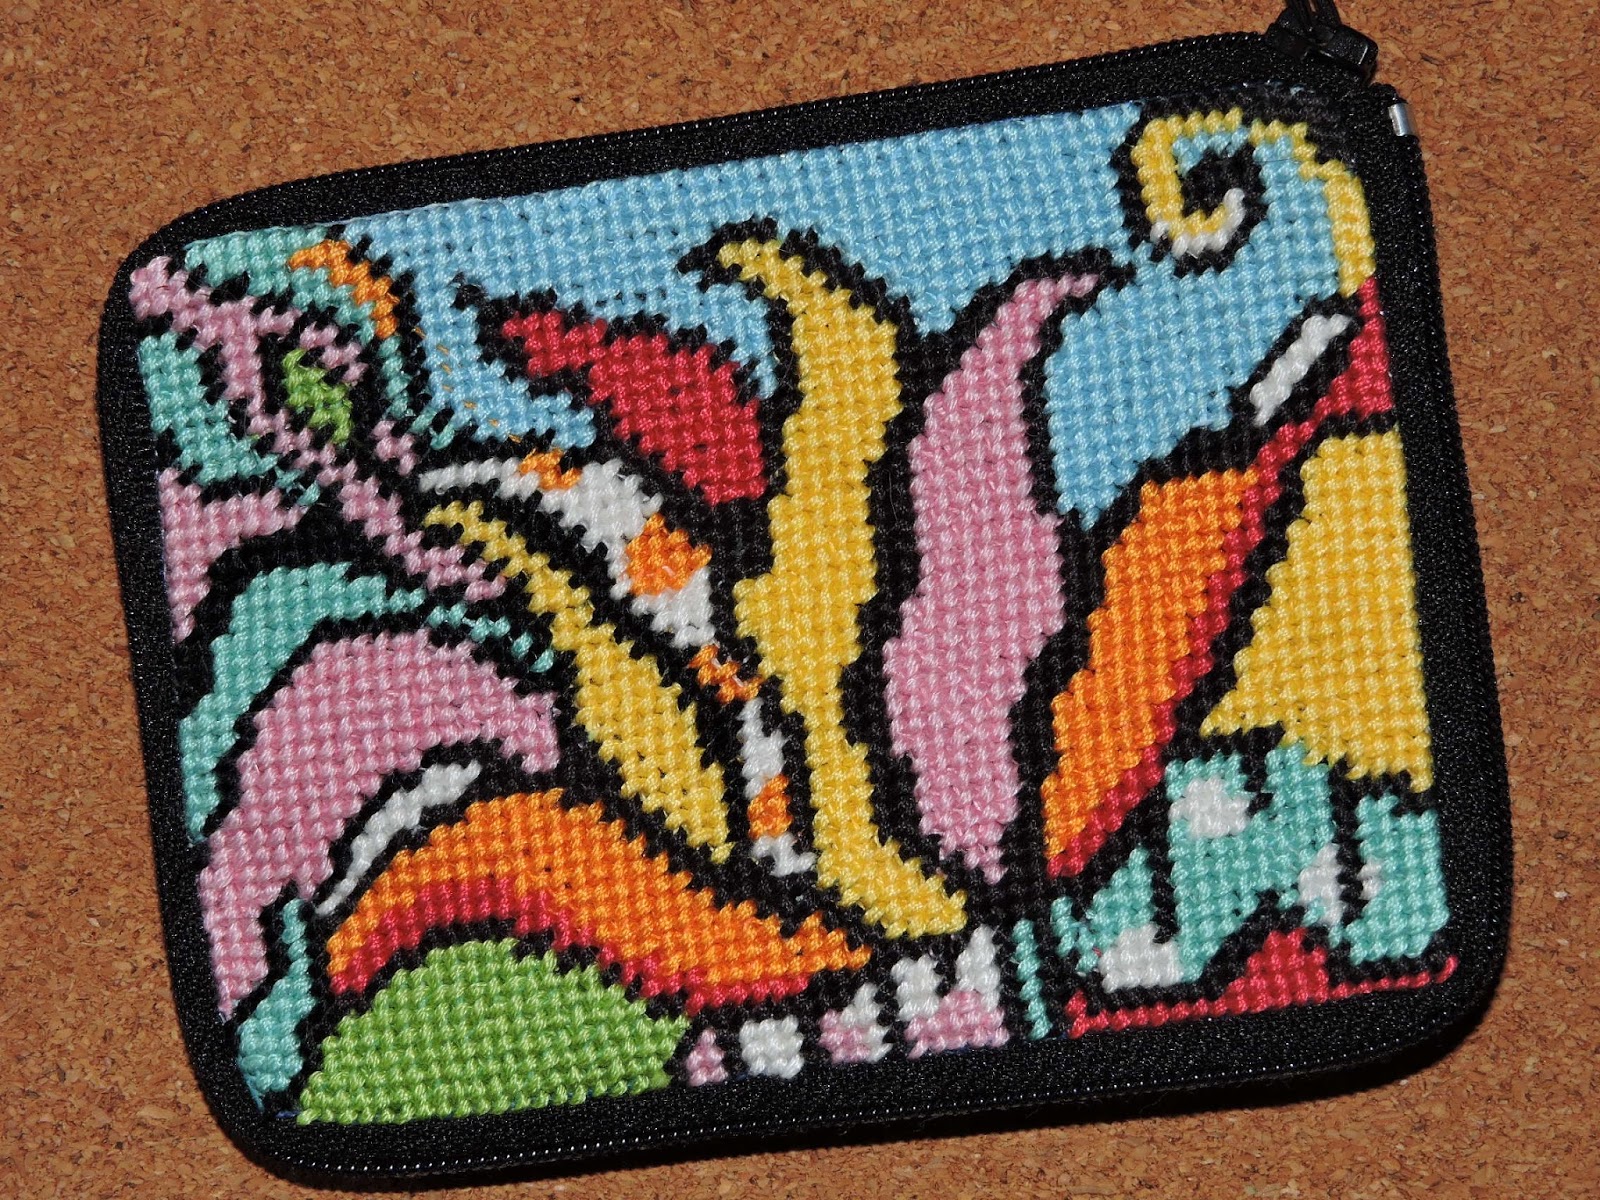
Here are my most recent projects...

The 14x14 one on the left is Dimensions Bouquet on Black, designed by Lisa Audit.  This one came with plenty of thread.  It was a bit of a struggle for me to differentiate between subtle tones in the threads, so I needed a lot of light while needlepointing it, but it's the fine details that make it look so realistic.

The 12x12 one on the right is Design Works Blue Floral.  The kit was a birthday gift from my daughter.  This one had acrylic yarn while the other project had thread.  Halfway through needlepointing the design, I realized I had been using the ice blue yarn instead of the light teal in too many places, and as a result, I ran out of the ice blue yarn.  Luckily, I just happened to have a skein of that exact same yarn color that I had been using for knitting projects, so I borrowed from that.  Just for the heck of it, I went over one section with the light teal after finishing with the ice blue to see what it would look like.  My plan was to cover the ice blue with the light teal and make those sections standing with extra thickness.  However, I liked the ice blue better than the teal, so my pillow is a cooler color than was intended with the kit.

It took a long time to get the pillows constructed because I had to order some trim and wait for it to come in.  I ordered a whole bolt of white cord with lip, and an assortment of laces in black, white, and pastel colors.  The whole time I was sewing the Blue Floral pillow together, I kept thinking, "This is too easy.  This is going too quick.  Something's wrong."

When I turned it outside in, I realized that I forgot to include the trim I'd been waiting for all those weeks!  See what I mean about my memory being bad?  I had them sitting right in front of me on the table and I still forgot to include them.  Then, just to add insult to injury, I discovered that I had no 12x12 pillow inserts!  After what happened with the trim, there was no way I was going to order 12x12 pillow inserts and wait for them to arrive, so I dug through my supplies and found some stuffing.  It worked just fine.

I chose off-white or vanilla lace for the big pillow, because there were a lot of shades of cream in the needlepoint.  These are the backing fabrics I chose for each out of my stash...

I don't buy fabric anymore because I went through a phase when I was ordering fabric at online sales much too often when I first started quilting.  Although I'm glad now that I did, because back then I could buy fabric for $3 to $8 a yard, and now it is much more expensive.  

Originally, I just bought purple and green fabrics for a king sized bed quilt I was making at the time, and I kept running out.  It was frustrating to get into a flow, only to have to stop work because of a lack of supplies.  So, I overcompensated by constantly buying fabrics to build up a stash until I needed to dedicate two floor-to-ceiling shelves to hold it all.  I've promised myself I won't buy anymore fabric until I've used what I already have.  

But I do accept gifts of fabric.  My sister-in-law sent me a beautifully coordinated set of fabrics by Robert Kaufman and Gustav Klimt for Christmas this year, and I can't wait to start tackling that quilt project.  We are definitely using quilts I've made in the past right now, because this has been the coldest winter I've experienced since living in Arizona.  Throwing a quilt over my bare feet sure beats struggling to put on socks with my arthritis.  

For those who are interested in what's going on in my life beyond crafts projects, my right hip has officially disintegrated.  The ball and socket are all jagged and I have several torn muscles.  I postponed hip replacement surgery until my son gets married, because I don't want there to be any complications that would prevent me from attending his wedding.  The wedding is in March, I should get my hip replaced in April and be done with physical therapy by June.  We'll see where it goes from there.  I'm anxiously waiting to see if I can ride horses again.

Saturday, July 7, 2018

Two Finished Needlepoint Pillows

I finally did it!  I think it took longer for me to piece the pillows together than it took for me to complete the two needlepoint canvases, but now I have the perfect lap pillows to set my laptop on while working.

The needlepoint canvas on the left is Design Works "Watercolor Floral" 12" x 12" Needlepoint Kit, which contains a 12 count interlock canvas printed in full color, acrylic yarns, needle and instructions.  The one on the right is Design Works "Peacock" 12" x 12" Needlepoint Kit with all the same contents.  Backing fabric, decorative edging, and pillow inserts or frames are not included.  Here's a picture of the backing fabric's I chose:

I'm impressed with my choices, because the coloring, subject matter, and style match the needlepoint images pretty well.  The instructions say to leave one edge open and hand sew it closed once the pillow form or stuffing is put in, but I like to make pockets so that the pillow forms can easily be slipped in and out.  The pillow on the left has a 3" overlay for the pocket, while the pillow on the right has a 4" overlay.  As you can see, the 4" overlay worked out better because the backing sits nicer and doesn't appear to be bulging at the seams.  For my pillow forms I used Acanva Home Collection 12" squares.


My life got turned upside down recently when my oldest mare colicked and had to be tubed by the vet, my oldest dog began urinating and vomiting all over the carpet, and I broke my toe on the shower door railing all within a few minutes of each other.  All that served as just one more reminder (or three) that time is of the essence and I have to get down to business and complete these various projects when I've got downtime and when I have two legs and two arms (and enough digits) to get the jobs done.

Friday, April 13, 2018

Needlepoint Projects in Progress

It seems that I like working on needlepoint canvases, but I'm not so keen on finishing the canvas by sewing it into a pillow.  Right now I've got two finished needlepoint canvases and started working on a third.  I've got pillows waiting to be covered, I've picked out matching fabrics and lace, but can't seem to get a big enough block of time to actually sew the finished product together.  I know what to do.  I've done it half a dozen times before.  I just seem to be suffering from a little sewer's block when it comes to these projects.  Here are some photos of what I've got so far...


One of my biggest challenges with needlepoint as of late is my eyesight.  When I complete all the sections of needlepoint, I start noticing stitches I skipped that reveal raw canvas, and I have to go back and do one stitch here, another stitch there...  It's very time consuming.  I got tired of tucking in heads and tails, so I ended up just stretching the yarn long distances across the back of the canvas to get from one missing stitch to another.  Very unprofessional of me, but who cares?  It's going to be hidden inside the pillow, right?  These are just for me.  I'm not planning on entering any contests, so all is good.

Oh, and I've got an appointment scheduled with a new optometrist next month.  Hopefully, they'll be better than my current dentist who called me in today to fill some cavities, and then told me to go home because I didn't have any.  There was a miscommunication between the dentist and the assistant and hygienist.  And before that I had requested a female hygienist, and someone switched me to a male hygienist at the last minute without my permission, so I had to pitch a fit to get the one I requested.  They also called me while I was sleeping early in the morning to try to move my appointment up earlier in the morning when I had specifically told them the only time I was available was in the mid-afternoon.  The list goes on and on with those people, so I'll be switching dentists soon too.

Saturday, February 11, 2017

Stitch & Zip Coin Purse

I just completed the Stitch & Zip preassembled needlepoint coin purse / credit card case.  This is model SZ215 Modern Tulip.  The finished size is 4-1/2" x 3-1/4".  As usual, there was plenty of floss left over.

I love these little projects.  They are so much fun, and since I don't have to constantly be consulting a legend to know what kind of stitch and what color thread to put where, I can easily needle my way through one of these while watching TV in the evenings.

I'm setting it on my coffee table, and first house guest to admire it gets it.

Thursday, January 26, 2017

Stitch & Zip Scissor Case

I completed this fun little project called the "Stitch & Zip SZ 920 Pink Rose on Black Preassembled Needlepoint Scissor Case" in about three nights.  The hardest part about it was hunting down the tiny scissors I knew I'd seen somewhere in my sewing supplies to put in it when done.

I only made one mistake.  When I finished the last stitch, I turned it over to look at the back and found a hanging loop of thread that didn't pull all the way through.  By that point I had put in way too many stitches to back up to the point of the loose thread, so I cut it in the middle with the intention of tucking each end into some stitches to finish it.  However, the thread ends were shorter than the needle and quickly frayed, making it impossible to thread them through the eye.  I gave up and cut them flush, figuring I'd fix it later once they worked their way loose.  There was plenty of thread left to do so.

It was the easiest needlepoint kit I've done yet.  Just how I like it.

Thursday, November 24, 2016

Frogs Needlepoint Kit

This project is currently in the shaping stage.  I have it pinned to my bulletin board to get it as square as possible.  I plan to buy a frame for it someday.  It's a 10x10 Design Works needlepoint kit simply called "Frogs".  It contains a 12 count interlock canvas printed in full color, acrylic yarns, a needle, and excellent instructions.

I think this is my favorite needlepoint kit yet.  It was simple enough that it didn't demand my full attention, so I could work on it while watching TV.  I believe I only made one mistake in which I started up a new row with stitches sloping in the wrong direction, which was easy enough to fix.  I didn't have any problems figuring out which colors needed to go where.

Because the canvas was printed in color, each time I added another color of yarn onto the canvas, it began taking on this 3D effect.  There were times when I considered just stopping and not adding yarn into some places, because I really liked the look.  It might be interesting to invent a kit that comes with a canvas that contains some sections with weave that you can needlepoint and other sections that are painted cloth that can either be left as is or embroidered to add more texture and shadow.  When you do an entire crafts project in the same stitch, it ends up with a flat appearance.  The hard part would be trying to figure out how to fuse different canvas types together.

I do wish there were more needlepoint kits with the challenge level of "Frogs".  It seems that most of the options out there are either super intricate flowers or landscapes that require a lot of focus and mapping between the legends and the hands on work you do, or kid's beginner projects.  I recommend "Frogs" for anyone who wants an adult needlepoint project that can be worked on when your life is full of distractions, and you just want something to do with your hands that can help you relax that will eventually result in a fun and beautiful end product.

Sunday, September 18, 2016

Needlepoint Eyeglass Case

This is my finished STITCH & ZIP preassembled needlepoint eyeglass case, copyright 2010 by Alice Peterson Co.  This design is called Paisley Jacobean.

If I could do one thing different, it would be to use the half cross stitch instead of the basketweave and continental stitches, because they warped even a small canvas like this enough to make the case lopsided.  I did use a wet cloth and iron, and stretched it out, but it's hard to undo something like that.  I suspect that with it being an eyeglass case, they recommend using full coverage stitches to avoid leaving naked canvas on the back that can scratch lenses, although the canvas provided with this project is a soft fabric as opposed to the harder, plastic kind.

The soft, fuzzy material on the back of the case had a lip to it at the top that I had to tack down with hand-stitching, because my sunglasses kept getting caught under it.  That step was not included in the instructions, but now I know to do that in the future before giving these out as gifts.  Not being able to get one's glasses out of the case easily is an annoying enough problem to make someone not use it.

With that said, this is an easy project that can be completed in a day.  I love the pre-printed canvas.  The only thing I would caution against is jumping into the needlepoint without first separating out the colors and studying the design.  There were several purple colors that were very close in hue, and I had to rip out a bunch of stitches because I picked up the wrong color when the lighting was bad.  Despite being a fast and easy crafts project, you still need to pay attention to what you are doing and think ahead.

Thursday, September 1, 2016

Finished Needlepoint Pillow

After many interruptions and distractions, I finally turned my "Floral Splendor" needlepoint project into a pillow.


I was never able to get the distortion stretched completely out of the finished canvas, so I had to sew it as a parallelogram.  I should have turned the cover inside out to examine how well I lined up the cording with the canvas and fabric before sewing, but I did not think of it, and so the final result was cord and lip sticking out further in some locations than others along the edge.

I also discovered that I do not have a sewing machine foot that is narrow enough for me to machine sew along the edges where cording is involved, so the pillow had to be hand sewn on top of the basting.  Basting is becoming my friend, because it saves me from a lot of pin pricks.

Also, this time I was smart enough to dig around in the kit for instructions on how to cut and assemble the backing, so there is enough overlap that I did not have to sew the back pocket together.  It's always a learning experience.  The problem is that it takes so long to complete just the needlepoint portion of a project this big that I forget what I learned from the previous time I attempted to construct a pillow.  That's why I write it down here.  Now I just need to remember to read my own blog before attempting to construct another pillow.

On another note, I ordered some smaller needlepoint projects online to keep my hands busy in the meantime, and one of them was a needlepoint coin purse.  When the box arrived, it contained the bag for the kit and the label, but no contents!  There was no coin purse, no thread, no needle, and no instructions.  The glue on the bottom of the bag had failed, and the contents must have fallen out in the warehouse.  I had to call Amazon to straighten things out.  The seller gave me a refund, but couldn't send me a replacement.  Oh well.  Sometimes buying products can be more of a hassle than it is worth, but at least the issue got resolved.

Monday, August 8, 2016

Another Needlepoint Block Complete

This is a Dimensions needlepoint project called "Floral Splendor", designed by Barbara Baatz Hillman from the Kooler Design Studio.  It's a pre-printed 18x18 inch canvas that can be made into a pillow or hung in a frame on a wall.  The finished product is 14x14 inches.

As I get older, my eyesight gets worse, so I try to avoid counted stitch projects.  I need the design to be printed on the canvas like this one.  However, due to the intricacies of this gorgeous design, I still managed to miss a few stitches even when using a magnifying glass on top of thick reading glasses.

There were also some hues that were too close to each other in color for me to differentiate between them, so I had to consult the legend repeatedly.  However, pinpointing a tiny spot on the canvas and matching it up perfectly with a tiny spot in the middle of the guide was no easy feat since the guide was blown up into two large pages.  Figuring out whether the middle spot I was working was on the left page or the right page was a struggle.  I decided to go rogue in the last few stitches, picking whatever colors I saw fit.

My other challenges with this project included me repeatedly dropping the needle and having it slip down the side of the couch onto the floor.  I had to crawl around with a flashlight several times to locate it.  I also kept "losing" floss, only to discover that it had stuck to my clothes and fell off somewhere in the house or garage.  Fortunately, there was plenty of extra floss left over by the time the project was done, so I really didn't need to worry.

Because I used the continental stitch mostly throughout, there is a lot of stretching that needs to be done at the moment.  I think I am on my fourth stretch.  If I do a similar project in the future, I will have to remember to use the basketweave stitch as much as possible to prevent distortion of the canvas.  The continental stitch usually results in a parallelogram shape instead of a square, so I have to mist the needlepoint with water, stretch and pin it to a bulletin board repeatedly until I get it as close to a square as I can.

I think I will opt to make a pillow since cording and fabric are much less expensive than large frames.  It should be beautiful when finished.

Monday, January 25, 2016

Needlepoint Wall Hangings

It feels like it took me a whole year to complete this 12x16 needlepoint kit...

...only to find out that I'm still not done with it, because despite stretching it out by misting it with water and tacking it to a bulletin board, it still does not fill the frame.  So, I need to complete 5 or 6 more rows at the top.

This is "Old Mill Cottage" designed by Violet Schwenig for Dimensions.  It was definitely the most ambitious and complicated needlepoint project I've worked on yet.  There are legends for the legends, so especially near the end while working on the finishing touches like French knots, there was a bit of deciphering I had to do.

Ironically, I completed this 5x7 needlepoint kit in a week...

This is "Butterflies Galore" by Design Works.

Despite just getting new glasses, I'm still struggling to see details.  I think every butterfly had at least two stitches that I missed, so I had to go back and tack in extra stitches.  I need to keep a bright light over the canvas while I'm stitching.  This was also the first kit that instructed me to use the half-cross stitch instead of the continental stitch, which I discovered makes it really hard to tuck in tails.  I ended up creating an occasional row of the continental stitch to make room for mistakes.

I appreciated the simplicity of this particular kit because the ink on the canvas matched the yarn colors, and enough yarn was provided to be creative.  I took some liberties with the smallest butterfly because it was supposed to be the exact same colors as the biggest butterfly and I wanted some variation.  That's why it looks like a kindergartner completed the smallest butterfly.

Tuesday, March 31, 2015

Teapot Tissue Box Cover

I've had this Bucilla plastic canvas 6243 teapot tissue box cover needlepoint kit for probably 15 years.   It still has the price tag on it, which shows that I paid $11.70 for it at Bend Franklin Crafts.  I know that the branch of that store I shopped at went out of business a long time ago, and needlepoint kits cost a lot more than that now.  I have no idea why it took me so long to complete it, but I feel quite satisfied to finally wrap up this project.

The most difficult parts were constructing the handle and the spout.  Also, because the majority of project utilizes white thread, and because I outlined the canvas patterns with a black marker before cutting them out, the thread kept getting dirty each time I pulled it through the edges with the marker ink.  I should have scrubbed the ink off the canvas before doing the needlepoint.  

The assembly directions were very general with no diagrams.  I tried looking up more information on the Internet regarding how to construct the spout, but the kit was so old that I couldn't find anything beyond people trying to sell unused kits on eBay.  So, I did my best.  I noticed that in the picture on the front of the kit, the teapot was angled to not show most of the spout, and I could tell that whoever constructed the example had trouble matching up the seams just like I did.  I suspect this is one of those projects that is expected to be flawed, since perfection seems impossible given the nature of whip-stitching plastic canvas together.

But I'm happy to be done with it, and now I have a cute tissue box cover.

Monday, August 11, 2014

Blocking Needlepoint

It's been a few years since I've made a needlepoint pillow.  I actually had several partially finished kits in my possession that I abandoned years ago, and just now decided to complete them before starting my next quilting project.  However, the canvases were stretched out like parallelograms and I needed them to be square before sewing the backing onto the needlepoint canvas.  The instructions told me to "block" the canvas, but didn't elaborate.  Thank goodness for the Internet.  I learned that I needed some cork board and pins or tacks.

We found a large cork bulletin board at our local hardware store for about $30 and I was able to block two needlepoint canvases at once.  You pin the canvas up, spray it with water, and then pull and pin until you shape it into a square.  Then you let it dry, and if it needs additional re-shaping, you do it again.  You are supposed to test the yarns for colorfastness, meaning that you take a piece of each color yarn, lay it on a paper towel, and wet it down.  If it bleeds, you have to dry block the canvas.  I never got that far, because I figured that with dogs in the house, the yarns had better be colorfast because I'm going to be washing these pillows constantly, and if they bleed, so be it.

The pleasure is in the process, right?  Who cares if the pillow actually lasts.  Here is a picture of the blocking process...

I had put the lip cord around the edge of the bigger canvas and pinned the backing on only to realize that the canvas was warped.  Pinning the cord was a pain, so I left it attached while doing the blocking.  The smaller canvas on the right isn't done.  I just wanted to re-shape it better while I was in the needlepoint phase, and it was a good thing, because it turned out that some of the weave was so smashed together that I completely missed a section I thought had been completed.

The bulletin board should come in handy for many more projects, such as pinning quilt blocks together and viewing them from a distance.  I used to hang a blanket on the wall and use static electricity to hold the fabric blocks up, but got tired of people asking me why I have a plain sand colored blanket hanging on my wall.  After a while I just told them we needed the extra insulation.