I set up two sewing machines side by side with different colored threads so that I could piece together two totes simultaneously. I was less likely to forget the instructions between totes that way. There's always some step I forget, and then I have to either rip out all the seams and backtrack, or come up with a new way to piece the tote together with what I have to work with.
Speaking of ripping out seams, I also finally took the machines off a 2 stitch length and bumped them up to 3 to making seam ripping easier. The longer stitches still hold together fine, but it's easier to get a seam ripper underneath the stitches if they are longer.
At first, I brought out my old New Home sewing machine and used it along with my new Singer Heavy Duty machine. The Singer never causes me any problems, but the New Home drove me bananas. I was experiencing everything from a fussy thread tension to broken needles to tangles of thread jamming the machine. When it seemed I was never going to get out of that cycle, I set the New Home aside and pulled out my industrial Brother machine. I normally reserve the Brother for using on a quilt rack, because it has an extra long arm, but I haven't set up my quilt rack in years. Let me just say that the Brother machine was a breath of fresh air. I can hear angels sing when I sew with it. Problems solved.
This first tote I completed uses a glitter fabric with purples, teals, and greens that my daughter gave me for Mother's Day. It's a really nice, thick, quality fabric.
I made taller pockets on the front to fit sunglasses and mobile phones.
So pretty. I kept the purple theme on the inside, but totally forgot to make interior pockets like I had planned. I think all the fussing around with that New Home machine tried my patience and I just wanted to get the job done. In the future I'll tape notes to the wall in front of my work table to keep me on track.
Keeping the with dark color scheme, I used a black zipper.
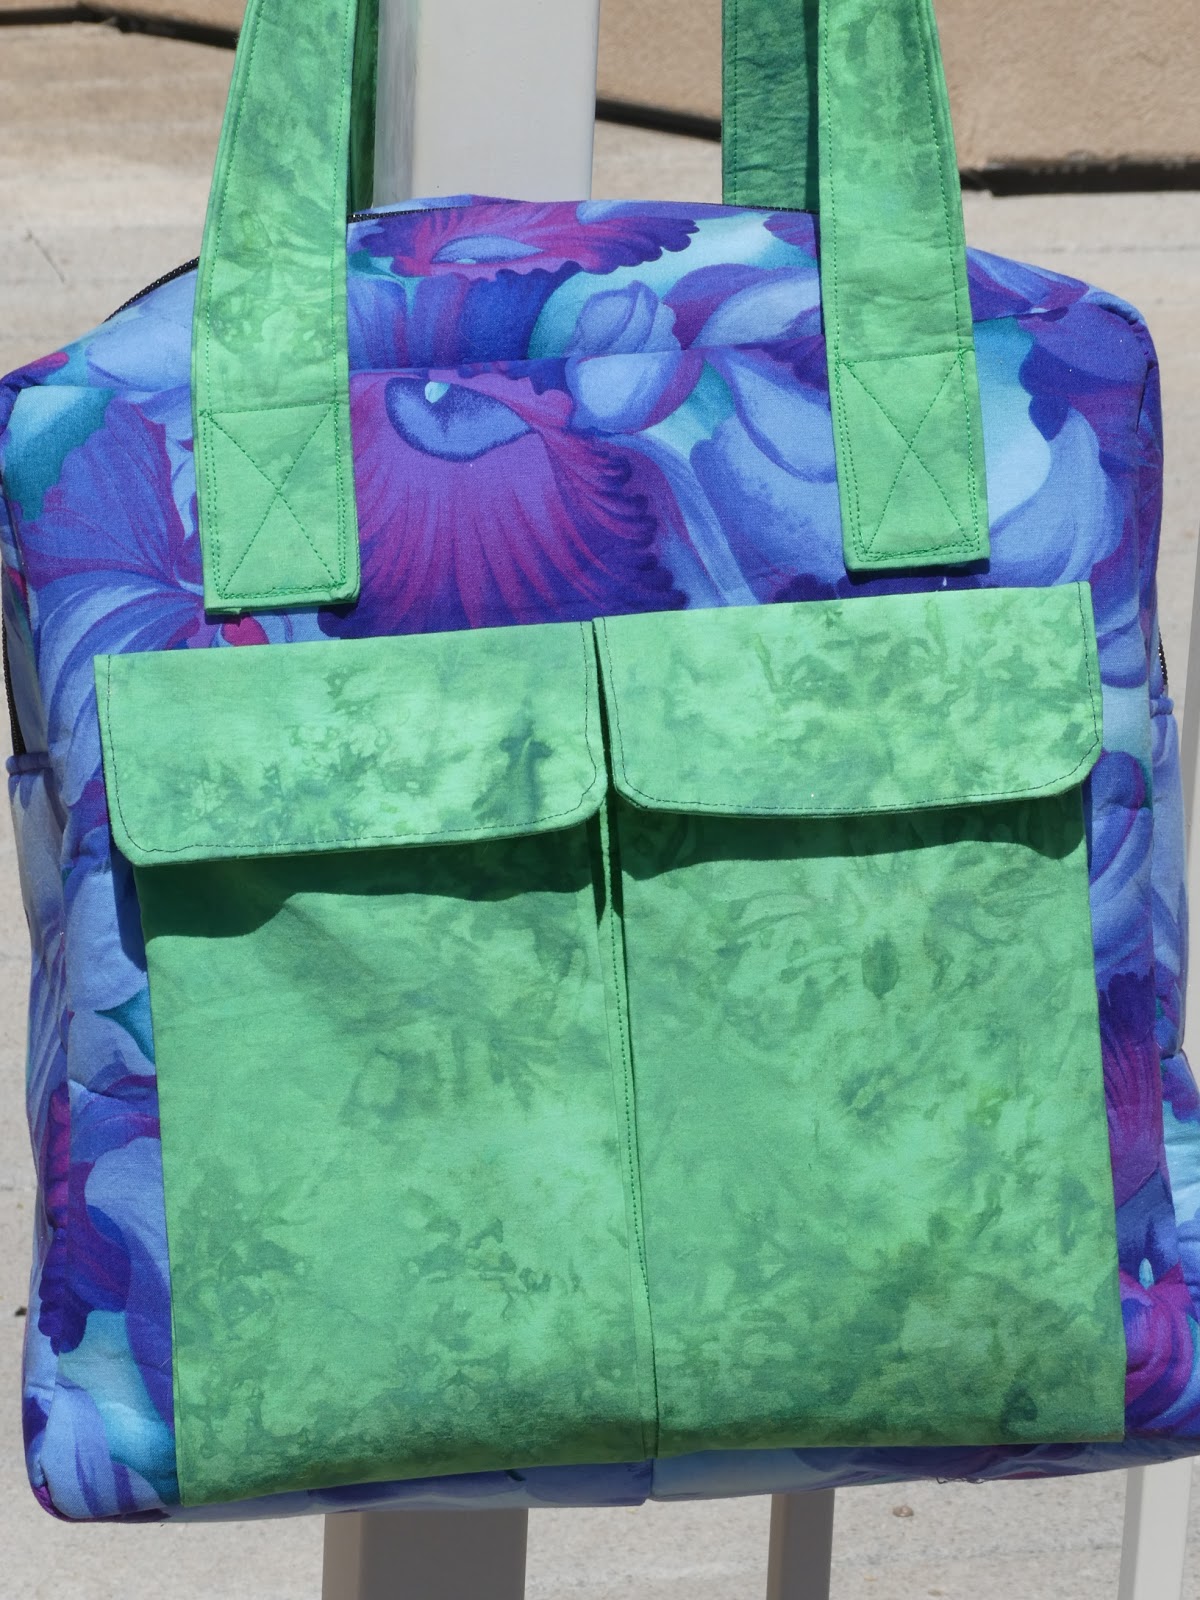
This next bag used a purple and teal fabric I've had around for a while, and I've been salivating over using it to make a tote. I struggled to find contrasting fabric in my stash. It's difficult to see from a distance, but the green almost matches a small amount of green in the main fabric.
This bag has super tall pockets. I think I'll tone it down in the future, because it almost completely covers the main fabric on the front.
However, you can see it it clearly on the back.
Black zipper.
Teal interior.
Monday, July 6, 2020
Tuesday, June 16, 2020
Blue Butterflies and Roses Tote
This blue butterflies and roses tote was my first tote I plan to sell. I wanted to use the same pattern I used last since it was fresh on my mind. I didn't have to read the instructions a dozen times before each step, because I remembered them.
The butterflies actually have silver glitter around their wings, and the purple fabric has gold print, so this tote sparkles.
I pre-washed the fabrics, and amazingly the glitter did not wash out, so I know this is a good quality fabric. I wanted to use a white zipper, but ran out. I have six more white zippers on order, but in today's pandemic economy, they can take weeks to get here.
I felt it was time to up the ante by including some interior pockets. Next time I'll make them deeper. You can barely see them in this shot because the bottom piece popped up in front of them. It's summer here, so the sun blinds me and I can't see what I'm photographing. It's too hot for me to want to do a retake.
Time to move on to making the next bag. When I have enough of them, I'll open a little online shop.
The butterflies actually have silver glitter around their wings, and the purple fabric has gold print, so this tote sparkles.
I pre-washed the fabrics, and amazingly the glitter did not wash out, so I know this is a good quality fabric. I wanted to use a white zipper, but ran out. I have six more white zippers on order, but in today's pandemic economy, they can take weeks to get here.
I felt it was time to up the ante by including some interior pockets. Next time I'll make them deeper. You can barely see them in this shot because the bottom piece popped up in front of them. It's summer here, so the sun blinds me and I can't see what I'm photographing. It's too hot for me to want to do a retake.
Time to move on to making the next bag. When I have enough of them, I'll open a little online shop.
Monday, June 8, 2020
Teal and Tan Tote
I made this latest tote for my daughter-in-law's grandmother, who expressed an interest when my daughter-in-law opened a birthday gift from me, which was that purple and teal tote I made a while back. I asked my daughter-in-law's mother what her mother's favorite colors were, and she said teal, then tans and browns.
It turned out that I had a lot of tans and browns, but not many that worked well with teal.
I also had tons of blue fabrics, but none that were teal.
I searched high and low online for some teal fabric, but it was all sold out. I guess that's the most popular color for face masks. So, I searched online for any local stores that sold fabric. If worse came to worse, I was going to go to Walmart, but I did find a small quilt shop in the next city. My husband and I drove our there, but I couldn't get into the quilt shop because they were only allowing curbside pick up for online orders or appointments to shop inside the store. I walked away dejected, and we stopped at a sports grill for lunch.
It suddenly hit me that I could call the store and ask if I could set up an appointment for half an hour in the future. Amazingly, they agreed to my terms, so after eating lunch, I walked into the shop, expecting to be the only customer. Instead I was shocked to see that the store was packed with women! It was like this secret society of quilters hiding out together in a fabric shop. We were all required to wear face masks and wash our hands, which I did.
I looked around a little bit for teal fabrics, but it wasn't easy because they were organized by manufacturer and theme, not color. A saleslady helped me, and I asked for a yard of any fabric that looked like it might work. I thought I was done collecting teals until I saw this corkboard pattern with gold flecks. I decided to substitute tan with gold.
I already had the gold and white fabric for the contrast of the pockets and straps. I used a purple, gold and teal fabric that I got at the local shop for the lining.
I had hoped to be proficient at sewing these totes by now, but I made a major mistake with this one. I struggle to read the instructions, because they jump around so much. They start out showing me how to construct Tote D, and then tell me to follow the rest of the directions from Tote B. The Tote B directions jump around a bit and some of the steps sound repetitive. They also use the word "lining" for the actual fabric lining and two types of interfacing, so it gets confusing.
Anyway, when I make the totes with the one big wavy pocket, I construct the lining separately and attach it to the tote last. However, with these zippered totes, I have to attach the lining in pieces as I put to outside of the tote together. I forgot about that and put the outside together and sewed the entire lining separate. When I realized my mistake I had the choice of ripping out all the seams of the tote, which were probably the most perfect seams I'd ever sewn, or use my ingenuity to figure out how to attach the lining in a new way. I ended up tacking the lining to the interfacing, and you can't even tell, unless you turn the bag inside out.
Here's a close up of the contrast fabric...
I'm getting more comfortable making the pockets and working with zippers. I've been making these totes as gifts for people in part because I think that people need something to brighten their day right now, and in part because I don't want to charge anyone for a product I am just learning how to make. However, this may be the last bag I'll give away for free, because stores are charging $13 a yard for fabric now, and that's too steep for me. Most of my fabric stash, which I compiled probably 15 years ago, cost around $3 to $5 a yard and it's still in good shape. Thank goodness I had the foresight to stock up before fabric got too expensive. Now I've just got to use it all before I die.
Also, I think I'm going to stop asking people what their favorite colors are, because I always end up in a conundrum and have to buy more fabric. From now on, I'm only going to use what I already have, put it together, and see who wants to buy the finished products.
It turned out that I had a lot of tans and browns, but not many that worked well with teal.
I also had tons of blue fabrics, but none that were teal.
I searched high and low online for some teal fabric, but it was all sold out. I guess that's the most popular color for face masks. So, I searched online for any local stores that sold fabric. If worse came to worse, I was going to go to Walmart, but I did find a small quilt shop in the next city. My husband and I drove our there, but I couldn't get into the quilt shop because they were only allowing curbside pick up for online orders or appointments to shop inside the store. I walked away dejected, and we stopped at a sports grill for lunch.
It suddenly hit me that I could call the store and ask if I could set up an appointment for half an hour in the future. Amazingly, they agreed to my terms, so after eating lunch, I walked into the shop, expecting to be the only customer. Instead I was shocked to see that the store was packed with women! It was like this secret society of quilters hiding out together in a fabric shop. We were all required to wear face masks and wash our hands, which I did.
I looked around a little bit for teal fabrics, but it wasn't easy because they were organized by manufacturer and theme, not color. A saleslady helped me, and I asked for a yard of any fabric that looked like it might work. I thought I was done collecting teals until I saw this corkboard pattern with gold flecks. I decided to substitute tan with gold.
I already had the gold and white fabric for the contrast of the pockets and straps. I used a purple, gold and teal fabric that I got at the local shop for the lining.
I had hoped to be proficient at sewing these totes by now, but I made a major mistake with this one. I struggle to read the instructions, because they jump around so much. They start out showing me how to construct Tote D, and then tell me to follow the rest of the directions from Tote B. The Tote B directions jump around a bit and some of the steps sound repetitive. They also use the word "lining" for the actual fabric lining and two types of interfacing, so it gets confusing.
Anyway, when I make the totes with the one big wavy pocket, I construct the lining separately and attach it to the tote last. However, with these zippered totes, I have to attach the lining in pieces as I put to outside of the tote together. I forgot about that and put the outside together and sewed the entire lining separate. When I realized my mistake I had the choice of ripping out all the seams of the tote, which were probably the most perfect seams I'd ever sewn, or use my ingenuity to figure out how to attach the lining in a new way. I ended up tacking the lining to the interfacing, and you can't even tell, unless you turn the bag inside out.
Here's a close up of the contrast fabric...
I'm getting more comfortable making the pockets and working with zippers. I've been making these totes as gifts for people in part because I think that people need something to brighten their day right now, and in part because I don't want to charge anyone for a product I am just learning how to make. However, this may be the last bag I'll give away for free, because stores are charging $13 a yard for fabric now, and that's too steep for me. Most of my fabric stash, which I compiled probably 15 years ago, cost around $3 to $5 a yard and it's still in good shape. Thank goodness I had the foresight to stock up before fabric got too expensive. Now I've just got to use it all before I die.
Also, I think I'm going to stop asking people what their favorite colors are, because I always end up in a conundrum and have to buy more fabric. From now on, I'm only going to use what I already have, put it together, and see who wants to buy the finished products.
Tuesday, May 26, 2020
Another Summer Tote
I made this one for my sister-in-law after she said that her favorite colors are orange and yellow.
I was short on orange and yellow fabrics. I wanted to keep the print images small, so I picked this darker fabric with little specs on it for the pocket, but it kind of eclipsed the tote, so I added the stripes to match the straps. It makes the tote look a bit sporty, which wasn't my intention, but does brighten up the front. A while back my husband offered to get me an embroidery machine, and I thanked him, but said no because I didn't have the room for one. This is a case where putting embroidery on the front pocket would have looked nice. Oh well.
This is the first time I did not follow the directions on how to position the magnetic snap tabs. The instructions have you set it up so that the tabs hang down while connected. I wanted to see how it would work out if I overlapped them. Turns out it worked out just fine.
I love this fabric. I can't believe I had it just sitting around in my stash all these years.
I was short on orange and yellow fabrics. I wanted to keep the print images small, so I picked this darker fabric with little specs on it for the pocket, but it kind of eclipsed the tote, so I added the stripes to match the straps. It makes the tote look a bit sporty, which wasn't my intention, but does brighten up the front. A while back my husband offered to get me an embroidery machine, and I thanked him, but said no because I didn't have the room for one. This is a case where putting embroidery on the front pocket would have looked nice. Oh well.
This is the first time I did not follow the directions on how to position the magnetic snap tabs. The instructions have you set it up so that the tabs hang down while connected. I wanted to see how it would work out if I overlapped them. Turns out it worked out just fine.
I love this fabric. I can't believe I had it just sitting around in my stash all these years.
Wednesday, May 6, 2020
Summer Tote
My daughter picked out the colors of yellow and blue for her tote. I laid out groups of fabric and texted pictures of them to her from my mobile phone. I gave her a choice of two pockets or four. She chose four, and then I gave her the choice of having all four pockets on the front or around the bottom half of the tote. This is the final product...
I've been working from my old stash of fabric, so I find it amazing that the blues and yellows of all three fabrics matched perfectly in tone and style. My daughter has an artistic eye.
Lessons learned from this project:
1. Stop back-stitching when the instructions tell me to baste. Baste means that I'm going to need to rip out the stitches in the future. I managed to tack the tops of each pocket pleat closed. If I chose to rip out the stitches, I would have destroyed the fabric, because I actually triple stitched those areas. I decided to leave the pockets as is since items will be less likely to fall out with the top of the pockets being tighter than the middles. In the future I will have to highlight the word "baste" throughout the instructions and perhaps hand baste instead of using the machine on its longest setting.
2. The sky fabric was more like a dyed sheet fabric than quilting cotton, so it was quite fragile to work with. No matter how much ironing I did, it just kept wrinkling as soon as I touched it. Also, the edges lost a lot of real estate as it shed threads along the way. I probably should have serged all the edges before sewing. For any bag I plan to sell, I'll have to check the quality of the cotton.
3. I keep forgetting the proper iron settings for each layer. The fabric can handle the cotton setting, while the interfacing and fleece cannot. I'm not supposed to touch the iron directly to the fleece or it will shrink and burn. Every time that I have to iron a piece of fabric that already has some fleece attached, the fleece falls off and I have to sew it on. So, in the future I'm going to need an iron settings cheat sheet to save me the time lost when having to correct damage caused by hasty ironing.
Now, onto the next project...
I've been working from my old stash of fabric, so I find it amazing that the blues and yellows of all three fabrics matched perfectly in tone and style. My daughter has an artistic eye.
Lessons learned from this project:
1. Stop back-stitching when the instructions tell me to baste. Baste means that I'm going to need to rip out the stitches in the future. I managed to tack the tops of each pocket pleat closed. If I chose to rip out the stitches, I would have destroyed the fabric, because I actually triple stitched those areas. I decided to leave the pockets as is since items will be less likely to fall out with the top of the pockets being tighter than the middles. In the future I will have to highlight the word "baste" throughout the instructions and perhaps hand baste instead of using the machine on its longest setting.
2. The sky fabric was more like a dyed sheet fabric than quilting cotton, so it was quite fragile to work with. No matter how much ironing I did, it just kept wrinkling as soon as I touched it. Also, the edges lost a lot of real estate as it shed threads along the way. I probably should have serged all the edges before sewing. For any bag I plan to sell, I'll have to check the quality of the cotton.
3. I keep forgetting the proper iron settings for each layer. The fabric can handle the cotton setting, while the interfacing and fleece cannot. I'm not supposed to touch the iron directly to the fleece or it will shrink and burn. Every time that I have to iron a piece of fabric that already has some fleece attached, the fleece falls off and I have to sew it on. So, in the future I'm going to need an iron settings cheat sheet to save me the time lost when having to correct damage caused by hasty ironing.
Now, onto the next project...
Sunday, April 19, 2020
Totes and Purses
My son gave me a tote and purse pattern for Christmas, Butterick Waverly Patterns B6148 Tote Bags Sewing Template, so I've been spending my time in quarantine learning how to sew them.
This red bandana and cowhide print tote was my first attempt.
I've never been adept at reading and comprehending sewing patterns. My first mistake was to read the phrase "fleece lining" and interpret it as "flannel lining". I caught my error before doing any cutting, but decided to use the flannel for the interior fabric lining.
The fleece and the fusible interfacing are what give the guts of the bag its structure. I knew I would want to make several bags, so I ordered a whole bolt of fleece and a whole roll of interfacing.
I thought I had put the magnetic snaps on backwards because they connect with the tabs hanging down inside the tote, but when I made my second tote, I followed the directions closely and found that was the correct way to install the closure. I find it to be kind of useless when it comes to keeping to opening of the purse closed. I might design my own closures in the future.
I sewed my second tote for a friend of my daughter who loves sea turtles.
My daughter picked out the purple fabrics on the pocket, handles and interior. Purple and teal are my favorite colors.
The second bag went together much faster.
I switched to a different pattern for my third tote. This one has pockets with Velcro flaps on the front, and a zipper closure on top.
Who knew having a zipper would make the project exponentially more complex? But, I'm proud of myself because I took it slow and figured it out.
One thing I would do differently with the design is make the pockets longer top to bottom, or install a second set of pockets above the ones on the bottom. I made this for my daughter-in-law, whose birthday is in a few days, so I don't want to mess with it right now. I have to allow for shipping time. But I do plan to design my own totes and purses as I get more familiar with the construction process.
I can't tell you how many times I read the pattern instructions and said, "This doesn't make any sense."
I ended up just having to do it to see how it all came together. For instance, I couldn't figure out why they were making me jump through hoops to sew pieces together one way when there was a much faster, much simpler way. It turned out that I had to jump through hoops in order to get all the seams hidden in the end. The last step of installing the interior fabric panels required whipstitching by hand.
Another thing I will do differently is sew on the Velcro as a later step, because the pattern instructions have you sew on the Velcro right away, and I melted one of the Velcro pieces when ironing the seams. I had to detach it and sew on a new one so that the flap would close.
I chose this grassy green fabric for the interior. I like that this tote has a backpack or luggage feel to it.
This red bandana and cowhide print tote was my first attempt.
I've never been adept at reading and comprehending sewing patterns. My first mistake was to read the phrase "fleece lining" and interpret it as "flannel lining". I caught my error before doing any cutting, but decided to use the flannel for the interior fabric lining.
The fleece and the fusible interfacing are what give the guts of the bag its structure. I knew I would want to make several bags, so I ordered a whole bolt of fleece and a whole roll of interfacing.
I thought I had put the magnetic snaps on backwards because they connect with the tabs hanging down inside the tote, but when I made my second tote, I followed the directions closely and found that was the correct way to install the closure. I find it to be kind of useless when it comes to keeping to opening of the purse closed. I might design my own closures in the future.
I sewed my second tote for a friend of my daughter who loves sea turtles.
My daughter picked out the purple fabrics on the pocket, handles and interior. Purple and teal are my favorite colors.
The second bag went together much faster.
I switched to a different pattern for my third tote. This one has pockets with Velcro flaps on the front, and a zipper closure on top.
Who knew having a zipper would make the project exponentially more complex? But, I'm proud of myself because I took it slow and figured it out.
One thing I would do differently with the design is make the pockets longer top to bottom, or install a second set of pockets above the ones on the bottom. I made this for my daughter-in-law, whose birthday is in a few days, so I don't want to mess with it right now. I have to allow for shipping time. But I do plan to design my own totes and purses as I get more familiar with the construction process.
I can't tell you how many times I read the pattern instructions and said, "This doesn't make any sense."
I ended up just having to do it to see how it all came together. For instance, I couldn't figure out why they were making me jump through hoops to sew pieces together one way when there was a much faster, much simpler way. It turned out that I had to jump through hoops in order to get all the seams hidden in the end. The last step of installing the interior fabric panels required whipstitching by hand.
Another thing I will do differently is sew on the Velcro as a later step, because the pattern instructions have you sew on the Velcro right away, and I melted one of the Velcro pieces when ironing the seams. I had to detach it and sew on a new one so that the flap would close.
I chose this grassy green fabric for the interior. I like that this tote has a backpack or luggage feel to it.
Tuesday, January 28, 2020
Partially Redesigned Tunic
Several years ago loose flowing swing tunic tops were a dime a dozen and with my expanding middle aged belly they quickly became my favorite style. However, today they are getting more and more difficult to find. I not only love this style because it is comfortable and covers unsightly bulges, but the knit fabrics don't shrink up like cotton tops. Pretty much every cotton top or T-shirt I've owned shrunk up above the waistline of my jeans displaying my muffin top and underpants, so I had to either use those shirts as rags or donate them to charity, thinking maybe they'd fit a short-waisted child or doll.
I was inexperienced with sewing knits, but found this beautiful fabric in my favorite combination of colors online. I ordered the fabric first, and then searched high and low for a pattern that resembled what I wanted to make. I quickly discovered that what I wanted did not exist in pattern form, so I ordered the McCall's EASY stich 'n save M9240 medical smock pattern. It was close to what I was looking for, and I figured I could make the adjustments necessary to get it closer to my goal.
I did my research on how to sew knit fabrics, bought special sewing machine needles and made sure my machine was on the appropriate settings. However, I learned that you cannot sew knits without first pinning, then basting, then sewing in small increments. If you think, "This section can just get sewn without all the prerequisites..." you're wrong. Knits require careful attention and positioning. Almost every time the fabric on the bottom layer got bunched up and I had to break out the seam ripper.
Perhaps my biggest struggle was with the pattern instructions. Not only were there typos, but sections were mislabeled. The diagrams didn't make sense, the instructions didn't make sense, the steps were out of order... It wasn't until I just decided to toss the instructions aside that I started making progress. Common sense served me better in piecing this top together.
In order to get the top more like I envisioned, I had to lengthen both the bodice and the skirt hem. The black waistband didn't really sit at the waist, but just below the bust of the young, perky-boobed model in the picture. With me having a middle aged bust, I needed that waistline more down at my actual waist. I also like my tunics to be as long as mini dresses.
Unfortunately, my adjustments weren't as simple as just lengthening the main sections in equal parts. As I pieced the top together I discovered that I didn't take several aspects into consideration.
For instance, the dickey between the black V needed to be longer too. I fixed that by inserting a second dickey above the original dickey. They both were loose, so they have a draping effect that I kind of like. I might use this technique in the future. It not only gives me more control over the draping, but also which colors I want to be front and center. I purposefully chose a blue piece of fabric since the original dickey was purple.
I also forgot to lengthen the black V frame. I needed to use that black knit material for future tops, so I didn't want to cut out completely new pieces. Instead, I just added little squares onto the existing pieces so as not to waste material. Interestingly, the seams are barely noticeable since the fabric is black and solid.
My other big mistake was the I didn't realize that in the pattern, the black waistband only covers the front, but not the back of the top, so the front ended up being a couple of inches longer. I'm currently debating on fixing this by either bringing up the hem in the front to match the back, or by taking it apart, cutting the back at the waist, and adding in another black band. Somehow I ended up with an extra black band, so I already have it. That fix will take a lot more time, but I think I will be happier with it in the long run.
If I really want to improve on it, and if I have enough fabric left over, I might just make a whole new back skirt that is looser and doesn't hug my butt, expanding the slit. I also screwed up the slits by not taking the time to measure them. One is much longer than the other. I doubt anyone will look at my clothes that closely, but it will bug me.
I figured that if I screwed up something, it would be the sleeves, but I actually did a pretty good job on them. Since knits tend to stretch and bunch up, any slight variation in length between the sleeves is hardly noticeable.
Though the fabric is tighter than I care for in the rear, the overall top fits amazingly well. I'm proud of myself, because this time I actually fitted it to my own body at different points during the process. What a difference that simple task made in the end. After attempting to sew my last top, I thought I'd never try again. It was such a disaster. After years of work, I had nothing to show for it and wear. All that fabric had to go into the scraps bin. This latest top, however, can definitely be worn. Keeping my expectations low leads to much more happiness and satisfaction.
Sorry about the blurry pictures. I didn't want to spend hours setting up a camera with a self-timer on a tripod. I'm having one of those days when my dogs need to go outside to potty every few minutes, so I don't have much time to spare on getting this post perfect. If I have time in the future to take better photos, I'll edit them in.
I was inexperienced with sewing knits, but found this beautiful fabric in my favorite combination of colors online. I ordered the fabric first, and then searched high and low for a pattern that resembled what I wanted to make. I quickly discovered that what I wanted did not exist in pattern form, so I ordered the McCall's EASY stich 'n save M9240 medical smock pattern. It was close to what I was looking for, and I figured I could make the adjustments necessary to get it closer to my goal.
I did my research on how to sew knit fabrics, bought special sewing machine needles and made sure my machine was on the appropriate settings. However, I learned that you cannot sew knits without first pinning, then basting, then sewing in small increments. If you think, "This section can just get sewn without all the prerequisites..." you're wrong. Knits require careful attention and positioning. Almost every time the fabric on the bottom layer got bunched up and I had to break out the seam ripper.
Perhaps my biggest struggle was with the pattern instructions. Not only were there typos, but sections were mislabeled. The diagrams didn't make sense, the instructions didn't make sense, the steps were out of order... It wasn't until I just decided to toss the instructions aside that I started making progress. Common sense served me better in piecing this top together.
In order to get the top more like I envisioned, I had to lengthen both the bodice and the skirt hem. The black waistband didn't really sit at the waist, but just below the bust of the young, perky-boobed model in the picture. With me having a middle aged bust, I needed that waistline more down at my actual waist. I also like my tunics to be as long as mini dresses.
Unfortunately, my adjustments weren't as simple as just lengthening the main sections in equal parts. As I pieced the top together I discovered that I didn't take several aspects into consideration.
For instance, the dickey between the black V needed to be longer too. I fixed that by inserting a second dickey above the original dickey. They both were loose, so they have a draping effect that I kind of like. I might use this technique in the future. It not only gives me more control over the draping, but also which colors I want to be front and center. I purposefully chose a blue piece of fabric since the original dickey was purple.
I also forgot to lengthen the black V frame. I needed to use that black knit material for future tops, so I didn't want to cut out completely new pieces. Instead, I just added little squares onto the existing pieces so as not to waste material. Interestingly, the seams are barely noticeable since the fabric is black and solid.
My other big mistake was the I didn't realize that in the pattern, the black waistband only covers the front, but not the back of the top, so the front ended up being a couple of inches longer. I'm currently debating on fixing this by either bringing up the hem in the front to match the back, or by taking it apart, cutting the back at the waist, and adding in another black band. Somehow I ended up with an extra black band, so I already have it. That fix will take a lot more time, but I think I will be happier with it in the long run.
If I really want to improve on it, and if I have enough fabric left over, I might just make a whole new back skirt that is looser and doesn't hug my butt, expanding the slit. I also screwed up the slits by not taking the time to measure them. One is much longer than the other. I doubt anyone will look at my clothes that closely, but it will bug me.
I figured that if I screwed up something, it would be the sleeves, but I actually did a pretty good job on them. Since knits tend to stretch and bunch up, any slight variation in length between the sleeves is hardly noticeable.
Though the fabric is tighter than I care for in the rear, the overall top fits amazingly well. I'm proud of myself, because this time I actually fitted it to my own body at different points during the process. What a difference that simple task made in the end. After attempting to sew my last top, I thought I'd never try again. It was such a disaster. After years of work, I had nothing to show for it and wear. All that fabric had to go into the scraps bin. This latest top, however, can definitely be worn. Keeping my expectations low leads to much more happiness and satisfaction.
Sorry about the blurry pictures. I didn't want to spend hours setting up a camera with a self-timer on a tripod. I'm having one of those days when my dogs need to go outside to potty every few minutes, so I don't have much time to spare on getting this post perfect. If I have time in the future to take better photos, I'll edit them in.
Monday, November 25, 2019
Neo Gets a Jacket
Of course, most jackets only go down to the waist, but I figure that dogs' butts get cold too. Amazingly, they don't pee or poop on the fabric because they lift their legs and tails when they do their business, which moves the fabric out of the way.
I managed to put Neo's jacket together in a couple of hours. I took his measurements and did some calculations, but I miscalculated how much fabric I'd need for the hem, so this jacket is a bit big. I had to add more Velcro to the straps to wrap them tighter. Oh well, at least he's got room to grow into it. When I made a jacket for Stewie when he was around Neo's age, he immediately grew out of it and I had to make another one.
I picked out a couple of fabrics and laid them on the floor. I asked Neo which one he liked, and he stood on this fabric. I didn't even realize it, but both Neo and Stewie's jackets have butterflies on them. I think they are both Hoffman fabrics. I've been saving them for quilting, but I came to the realization one day that even if I lived to be 100, there wouldn't be enough days left in my life for me to make quilts out of all of the fabrics in my stash, so I may as well use them for other projects as they arise.
Wednesday, November 20, 2019
My Latest Sewing Project
I belong to some quilting groups online, and I'm always inspired by what I see. I want to start working on a quilt, but I have to first finish my current project because it is taking up every square inch of my work space in my sewing room. I have a certain style of tops I like to wear. I love flowing tunic tops that drop down below crotch level. Very few people make jeans nowadays with a high enough waist to cover up underpants, so I try to cover my underpants with long tops. I also like to cover my butt while I'm at it.
Very few places carry tunic tops anymore, or if they do, they are way too short or way too tight to be called tunic tops. I don't need stretchy fabric clinging to my middle-aged tummy pouch. So, I decided one day to just start sewing my own tops since I knew what I wanted. The problem is that whenever I try to make garments from scratch, the dimensions are way off and the final result is unwearable. You almost need an engineering degree to design clothing patterns. I hate having to cut up clothing projects I spent months or years working on only to have no choice but to use the scraps for something else. Fabric isn't cheap.
So, I needed a professional pattern to work off. Of course, there were no patterns that fit what I wanted to make, so I had to find something that was close, and then alter it to fit my criteria. I stupidly thought it was as simple as making the skirt part of the top longer and wider, but then found out that meant I also had to lengthen the lining. Ugh. I totally forgot to do that, so I had to tack on little squares of fabric, which looks awful. I didn't know if I'd have enough fabric to make new lining from scratch and I wasn't willing to order more because I could see that this project was going to wind up being another failure no matter what I did. I was now in damage control mode.
The pattern I bought had several errors in the instructions and I was struggling to understand what they really meant to write. I'd read the instructions over and over and stared at the diagrams, but I couldn't make heads or tails of any of it. I finally decided to just use common sense.
I started making good progress today when I realized that this was too easy. Something had to be wrong. Something was always wrong when it came to sewing. I looked closer at my work and saw that the bobbin thread had run out four pin removals ago. Argh! I had to re-pin the seam and re-thread the machine after fixing the bobbin issue.
I went back to work and finished that step. The next step of the instructions made no sense to me. I did what they showed in the picture, and then realized that I was supposed to serge the raw edge of the lining before tacking it down. I didn't want to rip out the seams of the tacking because I had already had to rip out the seams of one shoulder to get it to line up, so I just serged around the tacking.
I was feeling proud of myself for pushing on despite the setbacks, when I stood up and looked down to see that I had accidentally stepped on the tie to the top and ripped it off the garment. One step forward -- two steps back.
"Oh well, I can sew it back on really quick," I told myself.
Nope! Somehow in that one inch of fabric I needed to sew, the thread got bunched up under the foot and my garment got jammed in the machine. When it rains -- it pours. I know when to quit. Time for some oatmeal cookies.
Very few places carry tunic tops anymore, or if they do, they are way too short or way too tight to be called tunic tops. I don't need stretchy fabric clinging to my middle-aged tummy pouch. So, I decided one day to just start sewing my own tops since I knew what I wanted. The problem is that whenever I try to make garments from scratch, the dimensions are way off and the final result is unwearable. You almost need an engineering degree to design clothing patterns. I hate having to cut up clothing projects I spent months or years working on only to have no choice but to use the scraps for something else. Fabric isn't cheap.
So, I needed a professional pattern to work off. Of course, there were no patterns that fit what I wanted to make, so I had to find something that was close, and then alter it to fit my criteria. I stupidly thought it was as simple as making the skirt part of the top longer and wider, but then found out that meant I also had to lengthen the lining. Ugh. I totally forgot to do that, so I had to tack on little squares of fabric, which looks awful. I didn't know if I'd have enough fabric to make new lining from scratch and I wasn't willing to order more because I could see that this project was going to wind up being another failure no matter what I did. I was now in damage control mode.
The pattern I bought had several errors in the instructions and I was struggling to understand what they really meant to write. I'd read the instructions over and over and stared at the diagrams, but I couldn't make heads or tails of any of it. I finally decided to just use common sense.
I started making good progress today when I realized that this was too easy. Something had to be wrong. Something was always wrong when it came to sewing. I looked closer at my work and saw that the bobbin thread had run out four pin removals ago. Argh! I had to re-pin the seam and re-thread the machine after fixing the bobbin issue.
I went back to work and finished that step. The next step of the instructions made no sense to me. I did what they showed in the picture, and then realized that I was supposed to serge the raw edge of the lining before tacking it down. I didn't want to rip out the seams of the tacking because I had already had to rip out the seams of one shoulder to get it to line up, so I just serged around the tacking.
I was feeling proud of myself for pushing on despite the setbacks, when I stood up and looked down to see that I had accidentally stepped on the tie to the top and ripped it off the garment. One step forward -- two steps back.
"Oh well, I can sew it back on really quick," I told myself.
Nope! Somehow in that one inch of fabric I needed to sew, the thread got bunched up under the foot and my garment got jammed in the machine. When it rains -- it pours. I know when to quit. Time for some oatmeal cookies.
Thursday, June 13, 2019
Sunflower Pillow
I completed a pillow made with Dimensions Dramatic Sunflower Needlepoint Kit, which contained presorted wool yarn, full color print on 12 mesh canvas, and instructions. The design is by Lisa Audit and the finished canvas is 14x14 inches.
I enjoyed the needlepointing. There were a couple of colors on the canvas that were difficult to tell apart, but the pattern is logical enough to figure it out. I chose this fabric for the backing because it mimicked the colors and shapes of the design on the front:
I had some difficulty re-shaping the canvas after I finished the needlepoint. Because they recommend the continental stitch, the square canvas ended up more like a parallelogram. I sprayed it with water and tried to stretch it back into a square on a bulletin board using pins, but after several attempts at that process without making much progress, I gave up. I think in the future I will always do the basketweave stitch, even if the continental stitch is recommended.
Sewing it together was a fiasco, as always. At first, everything was going suspiciously smoothly. It was looking like I might get it done in one sitting and have time to do barn chores and make dinner. Just when I began feeling elated over my good fortune, I turned the pillow over and saw that the backing fabric got bunched up and sewed down that way. Out came the seam ripper. I must have removed some pins prematurely.
Once I re-sewed the fabric down flat with the help of more pins, all I needed to do was double stitch another row around the perimeter of the pillow. I could do that in one minute. However, the thread broke. Cut to re-threading the machine. Then the needle broke.
I insisted upon being undaunted by all these challenges and worked as fast as I could to fix them. I was determined to get that pillow done since I was so close. However, the screw I needed to loosen to change the needle would not budge. I had to locate some oil, oil it, and then hunt around in my husband's toolbox for some needle-nose pliers. Once the needle was finally changed, I was on my way, whizzing along the border until the bobbin thread ran out.
Hands in air, I gave up. I was running out of time to take care of my other responsibilities. This morning, I put more thread on the bobbin and finished sewing the last row of stitches. Then I turned it inside out and stuffed the pillow form inside. Still a parallelogram. Oh well.
I think the biggest insult in this entire project was when I suddenly remembered while sewing the last side of the pillow together that I forgot, once again, to include piping, lace or ruffles in the border. This forgetfulness is getting to be a habit with me. I think black lace would have looked nice, but there's no way I'm going to rip all those stitches out now.
I enjoyed the needlepointing. There were a couple of colors on the canvas that were difficult to tell apart, but the pattern is logical enough to figure it out. I chose this fabric for the backing because it mimicked the colors and shapes of the design on the front:
I had some difficulty re-shaping the canvas after I finished the needlepoint. Because they recommend the continental stitch, the square canvas ended up more like a parallelogram. I sprayed it with water and tried to stretch it back into a square on a bulletin board using pins, but after several attempts at that process without making much progress, I gave up. I think in the future I will always do the basketweave stitch, even if the continental stitch is recommended.
Sewing it together was a fiasco, as always. At first, everything was going suspiciously smoothly. It was looking like I might get it done in one sitting and have time to do barn chores and make dinner. Just when I began feeling elated over my good fortune, I turned the pillow over and saw that the backing fabric got bunched up and sewed down that way. Out came the seam ripper. I must have removed some pins prematurely.
Once I re-sewed the fabric down flat with the help of more pins, all I needed to do was double stitch another row around the perimeter of the pillow. I could do that in one minute. However, the thread broke. Cut to re-threading the machine. Then the needle broke.
I insisted upon being undaunted by all these challenges and worked as fast as I could to fix them. I was determined to get that pillow done since I was so close. However, the screw I needed to loosen to change the needle would not budge. I had to locate some oil, oil it, and then hunt around in my husband's toolbox for some needle-nose pliers. Once the needle was finally changed, I was on my way, whizzing along the border until the bobbin thread ran out.
Hands in air, I gave up. I was running out of time to take care of my other responsibilities. This morning, I put more thread on the bobbin and finished sewing the last row of stitches. Then I turned it inside out and stuffed the pillow form inside. Still a parallelogram. Oh well.
I think the biggest insult in this entire project was when I suddenly remembered while sewing the last side of the pillow together that I forgot, once again, to include piping, lace or ruffles in the border. This forgetfulness is getting to be a habit with me. I think black lace would have looked nice, but there's no way I'm going to rip all those stitches out now.
Subscribe to:
Posts (Atom)